How to Make Sports Team Patches: A Step-by-Step Guide
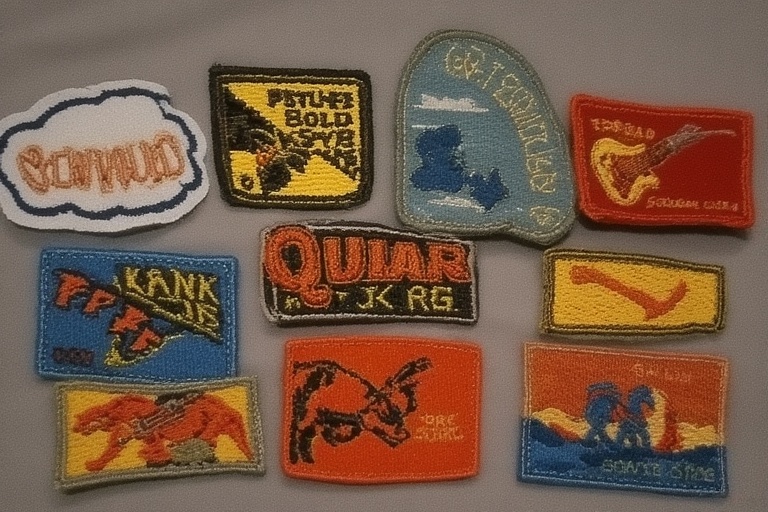
Sports team patches symbolize unity, pride, and identity. Whether for jerseys, jackets, or bags, creating custom patches is rewarding. This guide explains how to make sports team patches, covering design, materials, and application. Follow these steps to craft high-quality, professional patches that stand out.
Why Make Your Own Sports Team Patches?
Custom patches elevate team spirit. They allow unique designs that reflect your team’s values. Moreover, making patches yourself saves costs and ensures originality. With the right tools, anyone can create durable patches. Consequently, this process fosters creativity and team bonding.
Materials Needed for Sports Team Patches
Gather essential materials before starting. You’ll need embroidery thread, fabric (felt or twill), needles, and a sewing machine or embroidery machine. Additionally, acquire stabilizers, adhesive backing, and design software. These items ensure professional results. Always choose high-quality materials for durability.
Step 1: Designing Your Sports Team Patch
Start with a bold design. Use software like Adobe Illustrator or Canva to create your patch. Incorporate team logos, colors, and mascots. Ensure the design is simple yet striking. For instance, bold lines and minimal text enhance visibility. Save the design in a vector format for clarity.
Tips for Effective Patch Design
Simplicity is key. Avoid intricate details that blur when scaled down. Use contrasting colors for readability. For example, pair dark text with light backgrounds. Additionally, test the design at actual size. This ensures the patch looks professional on uniforms or accessories.
Step 2: Choosing the Right Fabric and Thread
Select durable fabrics like twill or felt. Twill offers a smooth surface, while felt adds texture. Choose embroidery threads that match your design colors. Polyester threads resist fading and wear. Consequently, your patches withstand frequent washing and outdoor use.
Step 3: Preparing the Embroidery Machine
Set up your embroidery machine correctly. First, load the design into the machine’s software. Next, attach the stabilizer to the fabric. This prevents puckering during stitching. Then, hoop the fabric tightly. Proper setup ensures precise stitching. Always test on scrap fabric first.
Manual Embroidery Option
No embroidery machine? Hand-embroidery works too. Use a hoop to keep fabric taut. Trace the design onto the fabric with chalk. Then, stitch using techniques like satin or chain stitch. Although time-consuming, hand-embroidery adds a unique, artisanal touch to patches.
Step 4: Stitching the Patch
Begin stitching with your embroidery machine. Monitor the process to avoid thread breaks. Use dense stitching for durability, especially for sports patches. Alternatively, for hand-stitched patches, maintain consistent stitch lengths. Afterward, trim excess threads for a clean finish.
Step 5: Adding Adhesive Backing
Apply adhesive backing for easy attachment. Iron-on backing is popular for sports patches. Cut the backing to match the patch size. Then, press it onto the patch’s back using a heat press. This ensures secure application on jerseys or bags. Test adhesion before final use.
Step 6: Cutting and Finishing the Patch
Carefully cut the patch along its edges. Use sharp scissors or a laser cutter for precision. Next, seal the edges with a zigzag stitch or heat-sealing tool. This prevents fraying. Finally, inspect the patch for flaws. A polished patch enhances team pride.
Common Mistakes to Avoid
Avoid rushing the cutting process. Uneven edges ruin professionalism. Additionally, don’t skip edge sealing, as fraying weakens patches. Use high-quality threads to prevent fading. Lastly, double-check design alignment before stitching. These steps ensure your patches look professional and last longer.
Step 7: Attaching the Patch to Uniforms
Attach patches securely to uniforms. For iron-on patches, use a heat press or iron. Place a cloth over the patch to protect it. Press firmly for 10–15 seconds. Alternatively, sew patches for extra durability. Use a tight stitch around the edges for a permanent hold.
Alternative Attachment Methods
Velcro backing offers flexibility. Sew Velcro to the patch and uniform. This allows easy removal for washing. Glue-on patches are another option but less durable. Choose the method based on your team’s needs. For instance, Velcro suits teams frequently updating uniforms.
Maintaining Your Sports Team Patches
Proper care extends patch longevity. Wash uniforms inside out to protect patches. Use mild detergent and cold water. Avoid dryers, as heat weakens adhesive. If patches loosen, reapply heat or restitch. Regular maintenance keeps patches vibrant and intact.
Where to Find Inspiration for Patch Designs
Seek inspiration from professional teams. Analyze their logos and color schemes. Additionally, explore online platforms like Pinterest for creative ideas. Join design communities to share concepts. Consequently, you’ll craft patches that resonate with your team’s identity and values.
Cost-Saving Tips for Making Patches
Save money by buying materials in bulk. Compare prices from multiple suppliers. Additionally, reuse scrap fabric for practice patches. Invest in a multi-needle embroidery machine for efficiency. These strategies reduce costs while maintaining quality. Thus, you create professional patches affordably.
Enhancing Patches with Multimedia Elements
Incorporate multimedia for unique patches. For example, add reflective threads for visibility. Use glow-in-the-dark embroidery for night games. Additionally, consider 3D puff embroidery for texture. These elements make patches stand out. Always test specialty threads for compatibility with your machine.
Structured Data for Patch Creation
Structured data improves patch production. Create a checklist for materials, design steps, and stitching settings. For instance, note thread colors and stitch density. This ensures consistency across batches. Moreover, organized data simplifies troubleshooting issues during production.
Building a Trustworthy Brand with Patches
Custom patches strengthen team branding. Consistent designs build recognition. Share patch creation stories on social media to engage fans. Additionally, involve team members in the design process. This fosters unity and pride. Strong branding elevates your team’s presence.
Conclusion: Create Your Team’s Legacy
Making sports team patches is a creative, rewarding process. Follow these steps to design and produce professional patches. From choosing materials to attaching patches, each step matters. Start crafting today and showcase your team’s identity. Share your designs with us and inspire others!